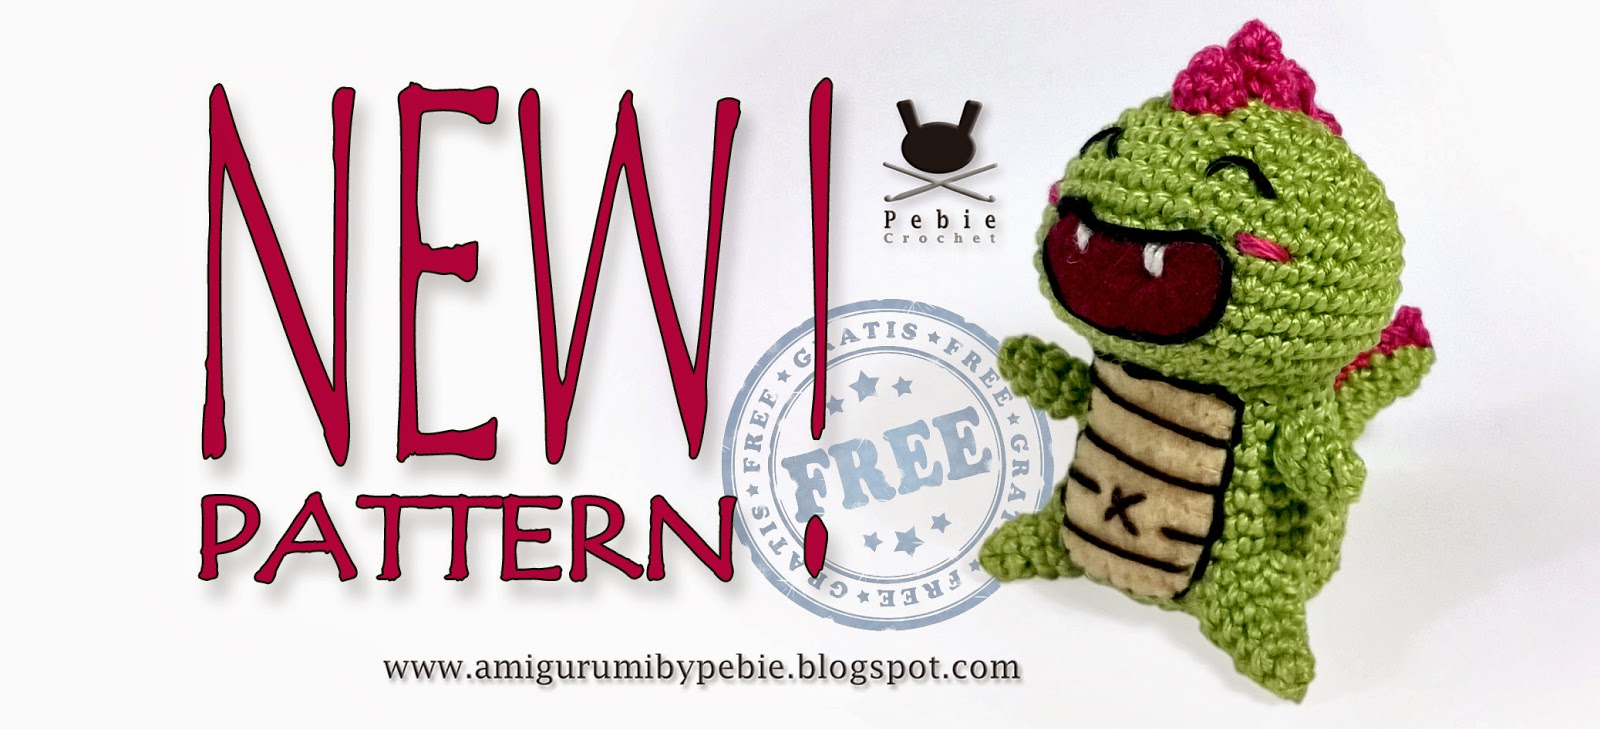
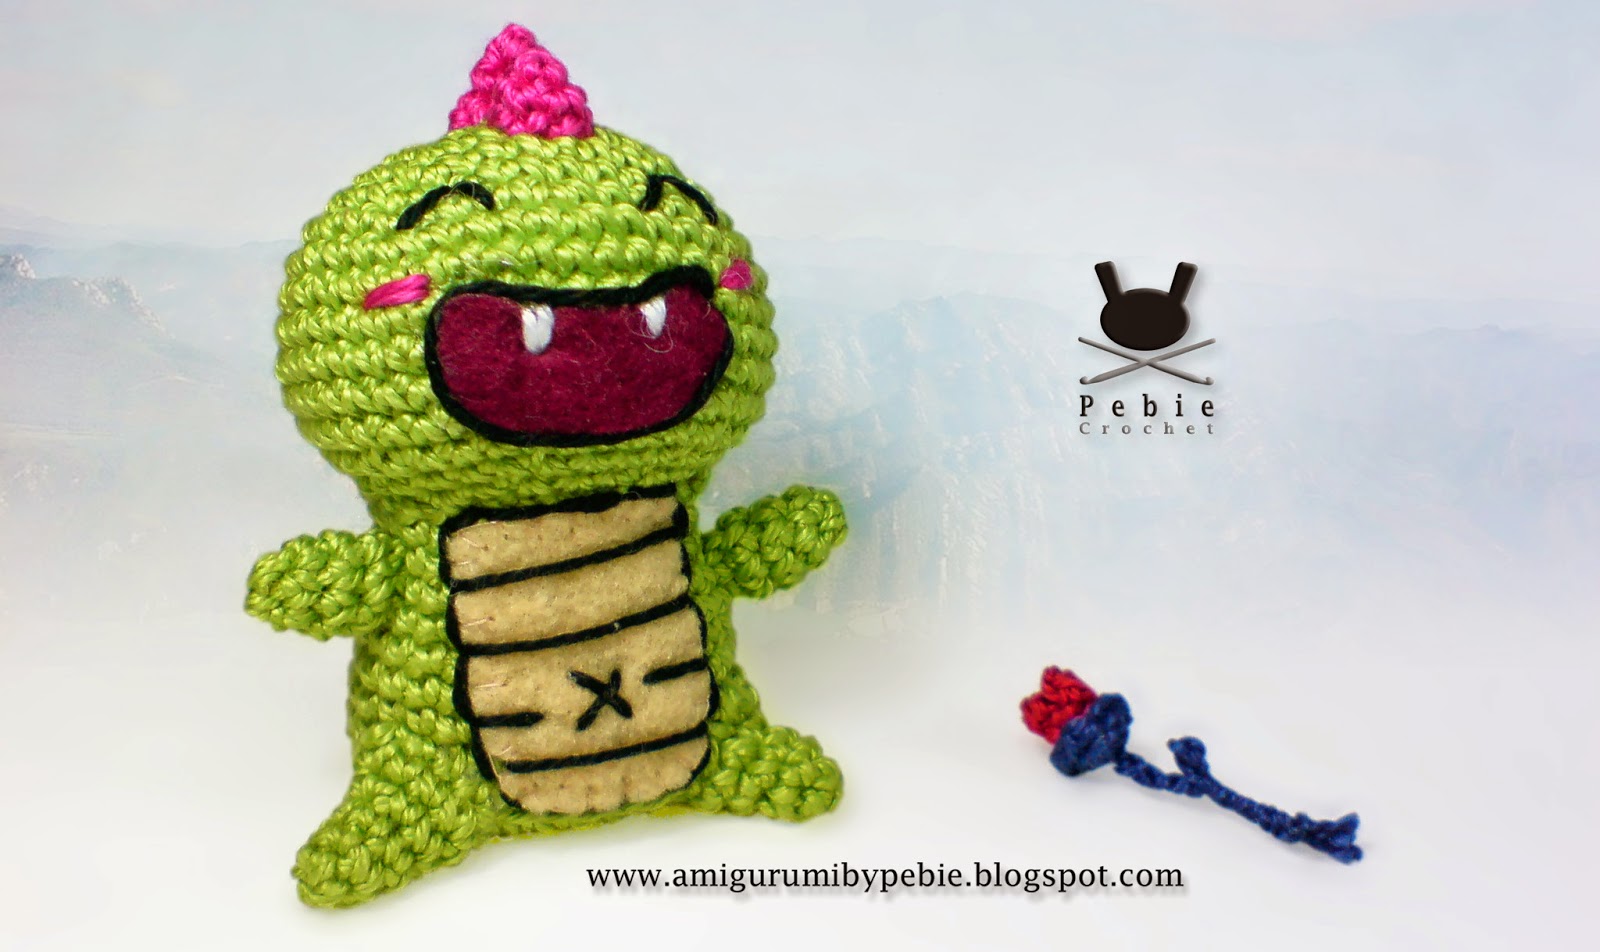
Here we are with a new pattern: Joanet, the dragon. He was introduced few days ago, and we've just finished the pattern right now ... and in three languages! Here the pattern is shown in English, but you can find the links to Spanish and Portuguese patterns at the end of this post. Enjoy it!
Joanet, the dragon
Free crochet pattern for personal use only.
This is an original
pattern made by Helena Pérez (Pebie Crochet), on April 2014. Do not claim it as
your own. If you want to share it, just link to this pattern, but please, do
not reprint on your site. You may keep a copy for your own personal use, but do
not sell or distribute this pattern, or the items made
from it.
Materials:
ü Cotton Crochet. Colors: Pistachio green, pink, and black.
I used DMC Petra nº
3. The skein weighs 100 g. and is 280 m. long. It's a 3 ply yarn. The
manufacturer recommends using a 2.5 mm hook. You have to use a 1.9 mm hook. Codes: 5907 (green), 53805 (pink) and 5310 (black).
ü White cotton crochet
(fangs embroidery).
ü 1.9 mm. steal crochet hook
ü Felt
·
Yellow color (belly).
·
Brow or deep red color (mouth).
ü Yarn needle.
ü Fabric glue.
Abbreviations:
Ch: Chain
Dec: Decrease
Hdc: Half double crochet
Inc: Increase
Sc: Single crochet
Legend

Pistachio green. Work
in continuous rounds.


7 ch.
R1: Start from second ch
from hook, 5 sc, 3 sc in last ch. Turn, 4 sc, 1 inc. (14 sts).
R2: 1 inc, 4 sc , 3 inc,
4 sc, 2 inc. (20 sts).
R3: 1 sc, 1 inc, 4 sc,
[1 sc, 1 inc] x 3, 4 sc, [1 sc, 1 inc] x 2. (26 sts).
R4: 2 sc, 1 inc, 4 sc,
[2 sc, 1 inc] x 3, 4 sc, [2 sc, 1 inc] x 2. (32 sts)
R5: Back loop only. Sc 32.
(32 sts)
R6-8: Sc 32. (32 sts)
R9: [14 sc, 1 dec] x 2
(30 sts)
R10 - 11: Sc 30. (30 sts)
R12: [13 sc, 1 dec] x 2.
(28 sts)
R13: Sc 28. (28 sts)
Fasten off, leave
long end for sewing. Stuff.
Head:
Pistachio green. Work
in continuous rounds
Note: Rounds from 1 to 3 are identical to those of the
body.
7 ch.
R1: Start from second ch
from hook, 5 sc, 3 sc in last ch. Turn, 4 sc, 1 inc. (14 sts).
R2: 1 inc, 4 sc , 3 inc,
4 sc, 2 inc. (20 sts).
R3: 1 sc, 1 inc, 4 sc,
[1 sc, 1 inc] x 3, 4 sc, [1 sc, 1 inc] x 2. (26 sts).
R4: [12 sc, 1 inc] x 2.
(28 sts)
R5: [3 sc, 1 inc] x 7.
(35 sts)
R6: [4 sc, 1 inc] x 7.
(42 sts)
R7-11: Sc 42. (42 sts)
R12: [4 sc, 1 dec] x 7.
(35 sts)
R13: [3 sc, 1 dec] x 7.
(28 sts)
R14: [2 sc, 1 dec] x 7.
(21 sts)
Fasten off. Stuff.
Tail:
Pistachio green. Work
in continuous rounds
R1: 4 sc in a magical
ring.
R2: 1 inc, 3 sc. (5 sts)
R3: 1 inc, 4 sc. (6 sts)
R4: 1 inc, 5 sc. (7 sts)
R5: 3 inc, 2 dec. (8 sts)
R6: 1 sc, 3 inc, 2 dec.
(9 sts)
R7: 2 sc, 3 inc, 2 dec.
(10 sts)
R8: 2 sc, 1 dec, 3 sc, 3
inc (12 sts)
R9: 3 sc, 1 dec, 1sc, 2 inc, 1 sc, 1 inc, 1 sc, 1 inc
(15 sts)
R10: 5 hdc, 3 sc, 1 inc,
3 sc, 1 inc, 2 sc (17)
R11: 6 hdc, 2 sc, 1 inc,
6 sc, 1 inc, 1 sc (19)
R12: 7 hdc, 3 sc, 1 inc,
5 sc, 1 inc 2 sc (21)
Fasten off, leave
long end for sewing. Stuff.
Legs (x2)
Pistachio green. Work
in continuous rounds
R1: 4 sc in a magical
ring.
R2: 2 inc, 2 sc. (6 sts)
R3: Sc 6. (6 sts)
R4: [1 sc, 1 inc] x 3.
(9 sts)
R5: [2 sc, 1 inc] x 3.
(12 sts)
Fasten off, leave
long end for sewing. Stuff.
Arms (x 2)
Pistachio green. Work
in continuous rounds
R1: 4 sc in a magical
ring.
R2: 2 inc, 2 sc. (6 sts)
R3-4: Sc 6. (6 sts)
Fasten off, leave long
end for sewing.
Back spikes:
Pink
30 ch.

R1: Start from second ch
from hook, [4 hdc in next st, 1 sl st, skip 1 st] x 3. 4 hdc in next st. 3 sl st. [skip 1 st, 3 sc in
next st, 1 sl st] x 3. [1 sl s. 1 sl st,
2 ch and 1 sl st in next st.] x 3. 1 sl
st.
Fasten off, leave
long end for sewing.
Horns:
Pink. Work in
continuous rounds.
© Big horn:
R1: 3 sc in a magical
ring
R2: 3 inc (6 sts)
R3: [1sc, 1 inc]x3 (9 sts)
Fasten off, leave
long end for sewing.
© Small horn:
R1: 3 sc in a magical
ring
R2: 3 inc (6 sts)
Fasten off, leave
long end for sewing.
Assembly:

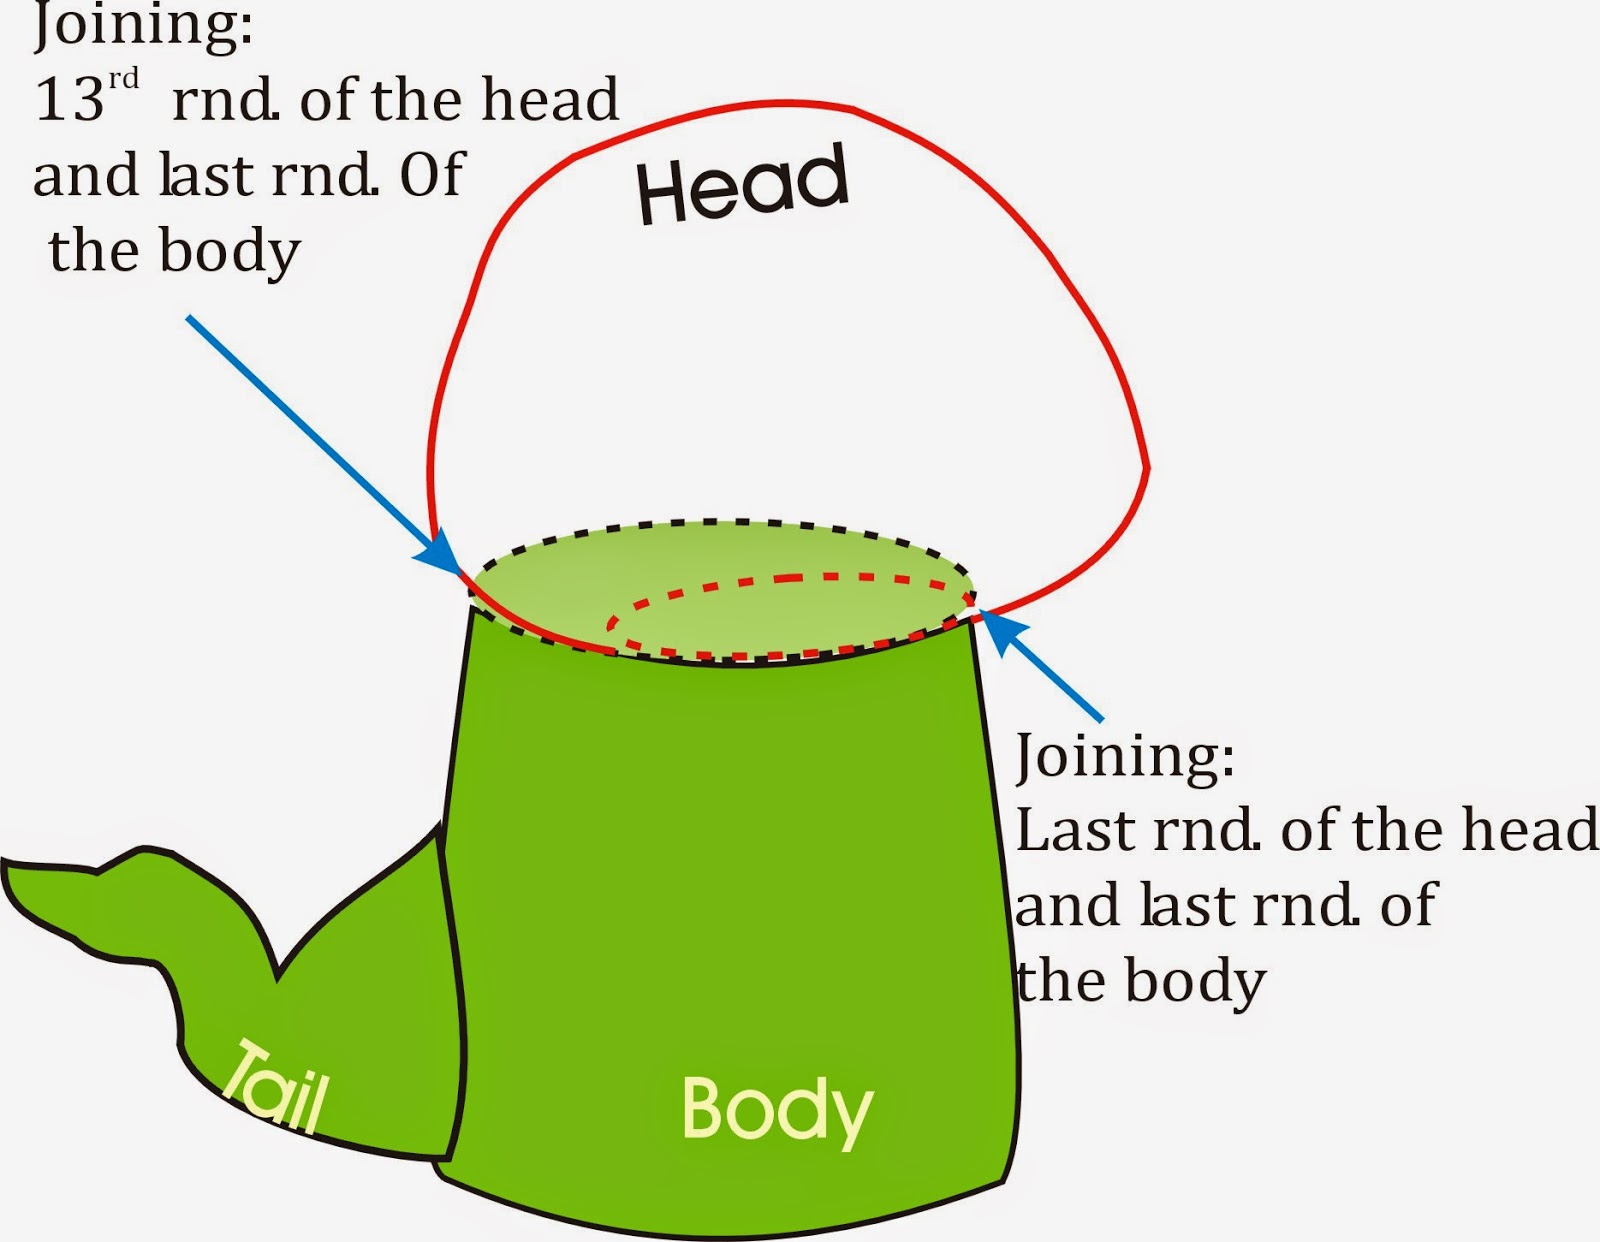
- Sew head and body together. Caution!: Notice that last round of the head is smaller than last round of the body. You have to join last round of each piece together only in front side of the amigurumi (see the draw above). In back side you have to sew 13rd round of the head and last round of the body together. Head will be tilted slightly upward.

- Sew tail to the body. The bottom of the tail on 5th round of the body.

2. Sew back spikes
to the head, body and tail. Place the first 4 spikes (the biggest) on the head,
from round 3; the others must be on body and tail.

3. Sew horns to the
head. Place them within the third round (see pictures below).


4. Sew legs to the body
5. Belly: Cut out a
piece of yellow felt with the form shown bellow. Measurements are
approximate. You probably have to adjust the size. I suggest making a previous
paper pattern. Finally, sew the belly to the body using a needle.

6. Embroider belly
lines and belly button, using black yarn (see the dragon picture). Don’t
forget to embroider the belly edge.

7. Sew arms to the
body.
8. Mouth: cut out a
piece of deep red (or brown) felt with the shape shown bellow. Measurements
are approximate. You probably have to adjust the size. I suggest making a previous
paper pattern.

9. Glue the mouth
to the head, within rounds 8 to 12. After that, embroider the fangs using
white yarn. Finally, glue a black yarn on the edge of the mouth.
10. Embroider eyes
using black yarn (on rounds 4 and 5, aprox.). Embroider flushed cheeks
with pink yarn.
And that's all!
Links to pdf patterns:
 |
| Photo editing; Miguel Ângelo Design |
Thank you for the pattern XD It's great and very detailed
ReplyDeleteMuchas gracias , es muy bonito y las explicaciones son magníficas.
ReplyDeleteBesos.
Glòria
This is fabulous! Shared :) how did you make the moving image? is there an application for this? Thank you!! Rhondda (Oombawka Design)
ReplyDeleteHi Rhondda! My brother made it, and I don't know how he makes animated pics. But I know that he doesn't use an only app, I think he uses a photo editor to make each picture (a .gif has many pics), and then he uses other application (a video editor) to joining them and get a .gif format. That's all I know!
DeleteWhere to play, gambling, online slots, and slots near me
ReplyDeleteGames 양산 출장안마 · Featured 제천 출장마사지 · SignUp · Casino & Sportsbook · 밀양 출장마사지 Gambling Sites 성남 출장마사지 Online 충청남도 출장샵 Live Casino
I enjoyed reading your blog thanks
ReplyDelete